| Japanese | English |
Revised on 2004/08/12
This measurement was originally performed in 2002/01, using DSSF3 ver.3, that is now sold as RAE version 2 since 2003/02. Because DSSF3 has been much improved since then, I decided to revise the report by using the latest version of DSSF3 (ver.5).
Because the impulse response data obtained in the first measurement was too
noisy and problematic, I use the other data ![]() ra5t.wav (48kHz / Stereo / 0.683sec / 128KB) in the following
analysis. How to measure this data is reported in Measurement
of PC's soundboard by RA 5 -Impulse response measurement.
ra5t.wav (48kHz / Stereo / 0.683sec / 128KB) in the following
analysis. How to measure this data is reported in Measurement
of PC's soundboard by RA 5 -Impulse response measurement.
Original report written in 2002
| Date: | 27-28 Jan. 2002 |
| Place: | Apartment Room in Nagoya, JAPAN |
| Temperature: | 20 degrees |
| Humidity: | 60% |
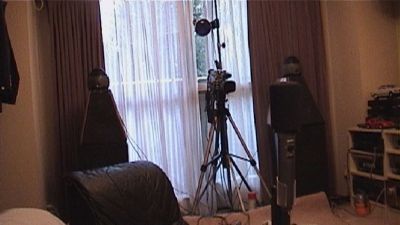
I want to make measurements without using the professional grade equipments, because it is a home audio.
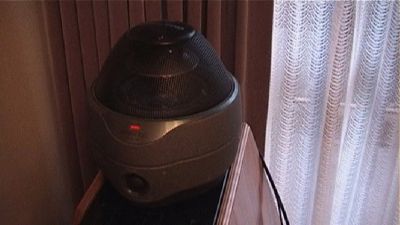
First, the omni-directional speaker OMNI5 was set on the other speaker placed on the regular position (Wilson Audio WATT3). The purpose of this experiment is to grasp the sound characteristics of the listening room.
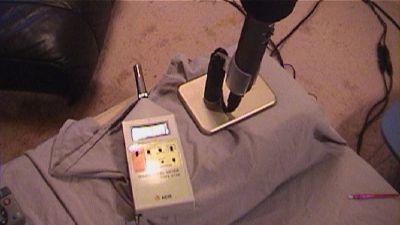
The background noise of the room is measured with the sound level meter. Background level is 40 dBA due to various electric appliances.
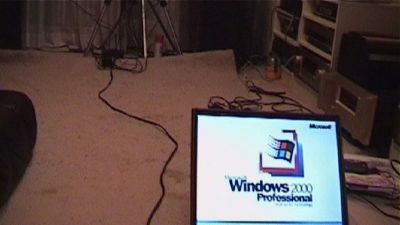
Now I start the measurement. The microphone is connected to PC and the Windows volume control is opened to setup.
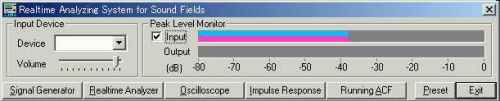
The next figure is a screen copy of Windows volume control. This is the selector of an input and an output device. In the record control, microphone is chosen in the input panel. In the play control, mute box is checked for the line input and the microphone input.
This setting is IMPORTANT! If a microphone input is not mute, the sound of a speaker output goes into the microphone and the sound come into the microphone is outputted to a speaker immediately again. Howling will be the worst case. Be careful.
In order to obtain the maximum sensitivity, move the input volume of a microphone to a right end. Appropriate input level is about -10 dB. But as shown in the figure below, the input peak level didn't reach to -10dB even I fed a loud sound. It is better to use an external microphone amplifier.
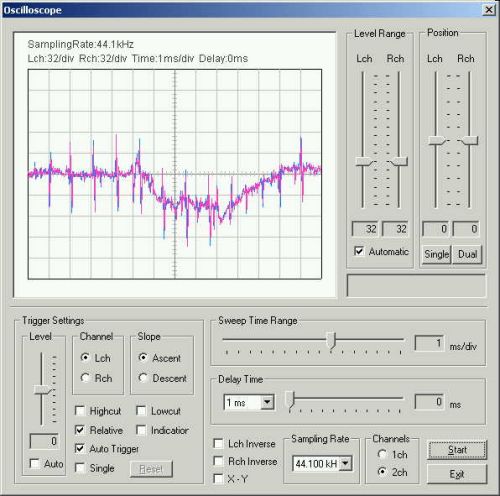
A test signal was outputted using a signal generator and measured by the oscilloscope. A 1kHz sine wave was outputted from left and right channels. When I saw it with an oscilloscope, it turns out that much noise is contained as below.
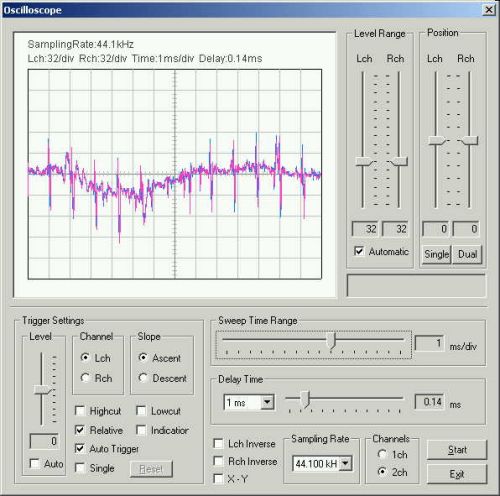
Noise didn't disappear even after the sine tone was stopped. Perhaps some problem is happening in the equipment.
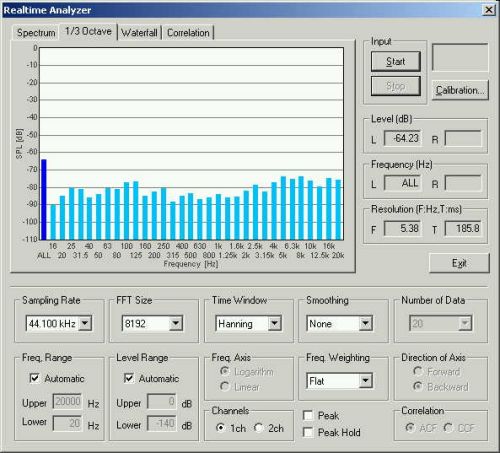
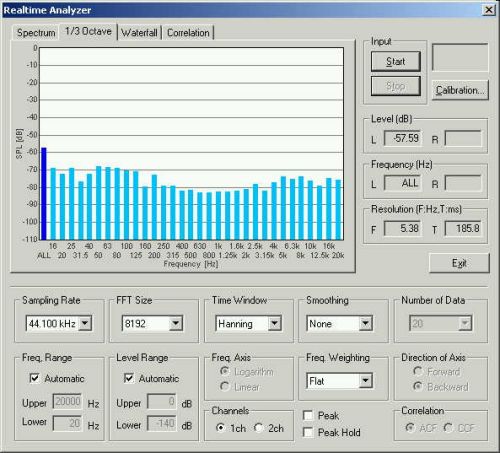
I changed to 1/3 octave analysis to investigate the background noise. No significant peak frequency can't be found.
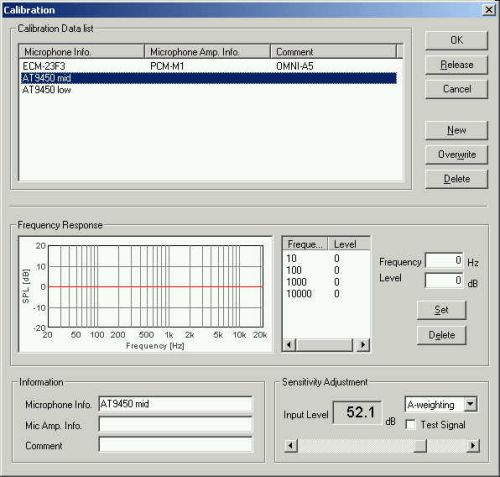
Now, a microphone was calibrated so that the sound pressure level can be measured. Calibration window is accessed from the FFT analyzer window. Marking of "Test Signal" box outputs a 1kHz sine tone. However, even if I tried the calibration how many times, the input level display did not match that of the sound level meter. Even if I fed a loud sound into a microphone, peak level meter does not exceed -30dB or more. The input level of the microphone is low.
After some investigation, I found that the circuit of the microphone input was not operating correctly. So, I decided to use DAT (TEAC TASCAM DA-P1: see the picture below).
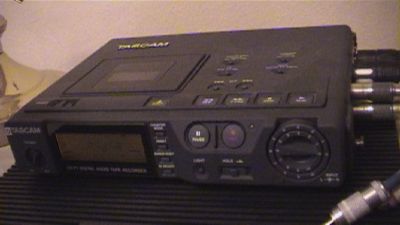
Then, all the problems were solved. It is good to use DAT as a microphone amplifier with the line-in terminal of a personal computer. There is a margin in a gain and operation is also stable. It's performance cannot be compared with the built-in microphone of the personal computer. Now, the impulse response can be measured, and the calibration of microphone is also likely to succeed.
The first cause of this trouble is that the sound function of a personal computer had been broken. The second is that the sensitivity of the built-in microphone was bad. Extraordinarily exact measurement is possible when you use the external microphone and the microphone amplifier.
January 2002 by Masatsugu Sakurai
From here, written in 2004/08/12
Before going to the analysis, I explain how to perform the measurement. You can obtain exactly the same result as in this report by following the procedure described below. First, download the sound file ra5t.wav on your hard disk. How to measure this data is reported in Measurement of PC's soundboard by RA 5 -Impulse response measurement.
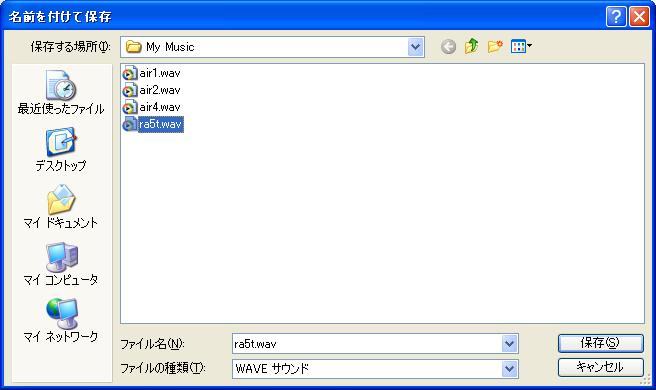
Right click the file name to download it. A dialog appears as below. In this example, I saved the file as ra5t.wav in the directory "My Music".
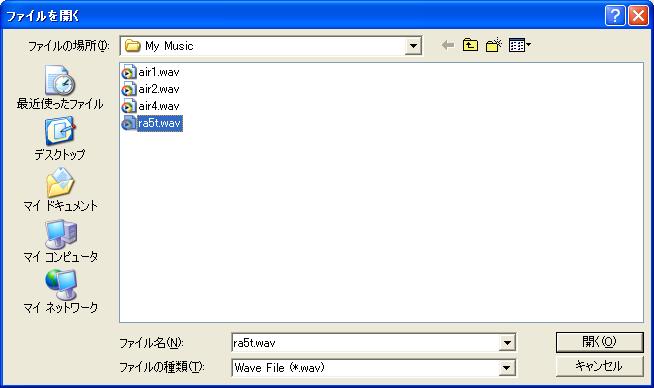
Then, the saved file is loaded by RA. Start RA, open the "Impulse Response" window, and click the "Load" button. The "Load Measurement Data" dialog appears. Click the "Wave File" button and open the file "ra5t.wav".
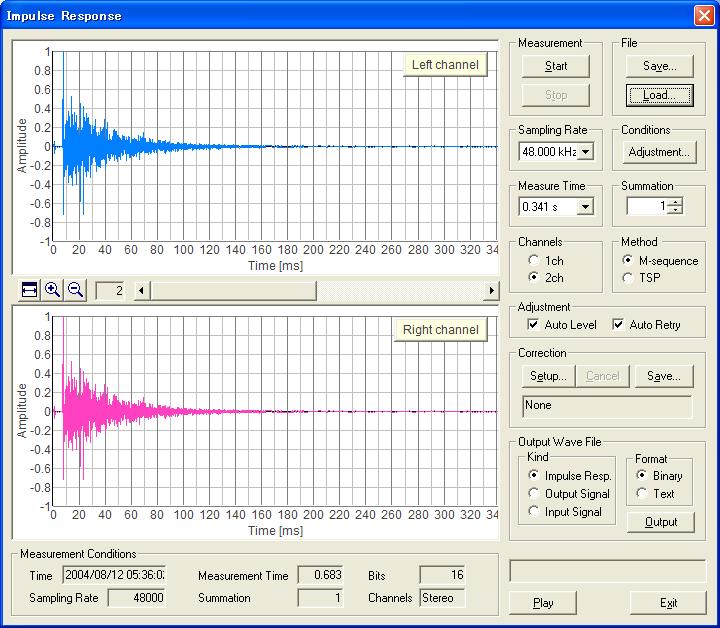
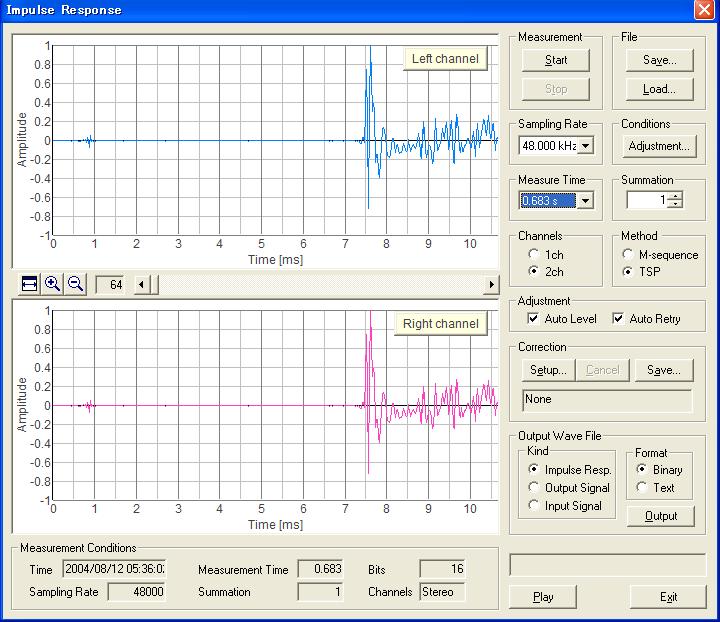
After loading the sound file, the impulse response data immediately appears as shown in the figure below. File information such as the sampling rate, channels, bits, is displayed in the bottom of the window. You can listen to the sound by clicking the "Play" button.
The next figure is the same data, but the time axis is zoomed at x64 so that the arrival time of the direct sound can be measured easily. I can see that the direct sound arrives at 7.5 ms. From this value (dt), the distance between the microphone and the loudspeaker can be calculated as D = C * dt, where C is the speed of sound in the air: C = 20.03 *sqrt(273 + temperature). In this measurement, C = 20.03 *sqrt(273 + 22.5) = 344.32 m/s, and thus the distance D = 344.32 * 0.0075 (s) = 2.582 m.
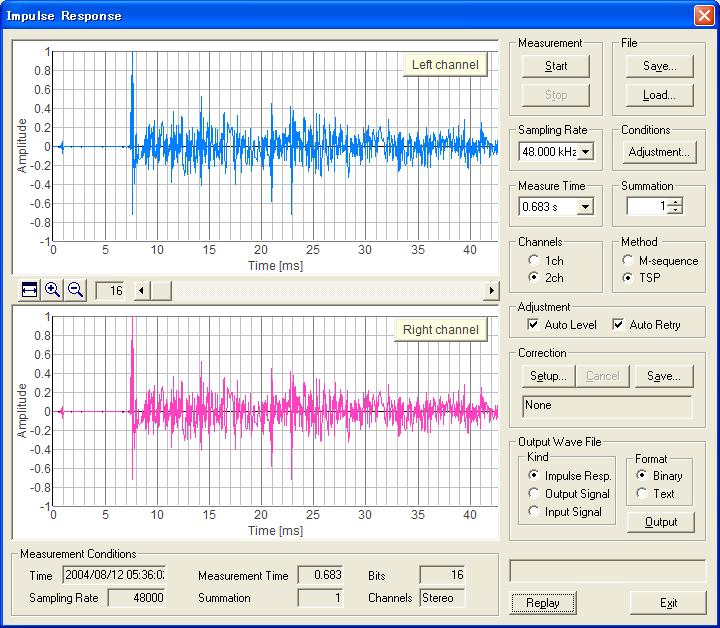
In the next figure, the same impulse response is zoomed at x16. Many reflections come after the direct sound. Among them, the first reflection is from the floor, that arrives at 0.5 ms after the direct sound. The reflection from the sidewall of the room might be found at around 14 ms.
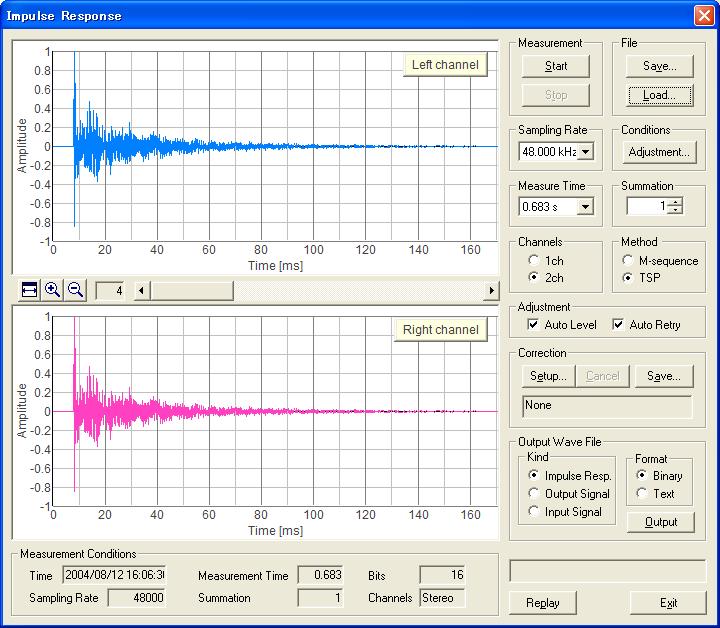
The next figure shows the other impulse response data ra5t2.wav, that was measured at the listening position.
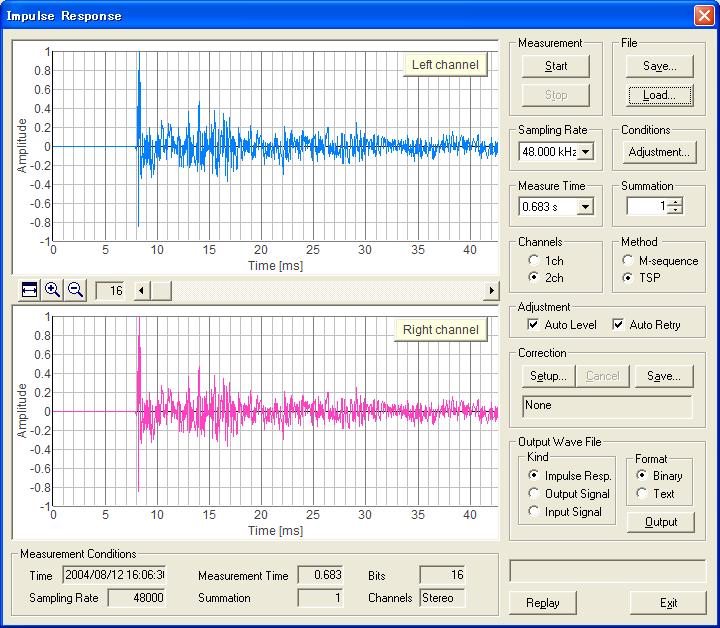
The same data is zoomed at x16. The arrival time of the direct sound is 8 ms, and the reflections from the wall are found at 13 ms and 14 ms.
Next I report the detailed analysis by SA.
End of revision 2004/08/12