After installing Mmlib, apply the online-update to assure that the software is the latest version. Select the "Online Update" from the "Help" menu. Confirm that your Mmlib is the latest version. If there is a module to be updated, online update will start automatically. Next, select the "Online Manual" from the "Help" menu. You can read the latest program manual (this document) anytime by online.
Next, confirmation of the initial setup is highly recommended. To confirm the initial setup, select the "Options" from the "File" menu. There are five tab menus for the setup. In the Folder menu, database folders are specified. After the initial installation, Mmlib starts with the default setup as shown below.
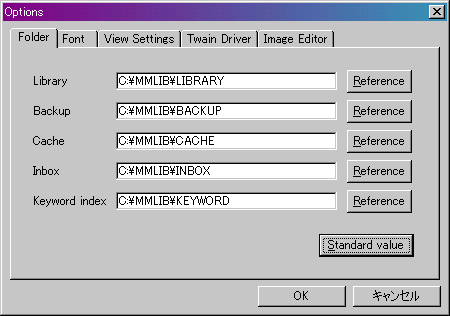
In the Folder menu, database folders are specified. After the initial installation, Mmlib starts with the default setup as shown in the figure above. Usually, you do not need to change the initial settings.
From the "Start" menu of Windows, choose "Programs" -> "Multimedia Library" -> "Multimedia Library Manager". The following window will open.

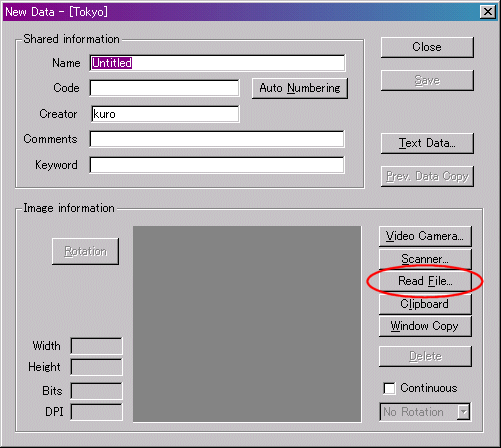
Click the button ![]() (New Data) on the window above. Then, the following window opens. When you
import a new document, always click this button.
(New Data) on the window above. Then, the following window opens. When you
import a new document, always click this button.

As for a "Code", consecutive numbers are attached automatically. If the information about the picture is inputted into the "Name", "Comments", and "Keyword" column, you can search them later. But at first, you can ignore them. New files are automatically named and stored in the database.

Click the lower right "Scanner" button.

This screen differs between models of the image scanner. Import a picture according to the operation manual of your scanner. When import is completed, it will return to the previous window.

Confirm that the imported picture is indicated in the "Image information" area, and click the upper right "Save" button. A picture is stored into a database. After the "Save" button is clicked, "Code" will increase by ten. Let's import pictures continuously.

Totally three pages were imported.

Click the "Close" button and return to the first window.

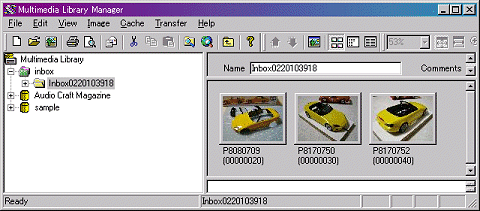
In the left side "Tree view", a folder is created named "Inbox0509165127". The number following "Inbox**********" expresses the "month-day-hour-minute-second." This can be changed into a favorite name. In that folder, the three pictures imported have been stored. In the state where the folder is chosen, click once again, right click the folder, and choose "Change information."
If the picture is imported continuously, folders will be created under the "Inbox" one after another.
Start the Mmlib (Multimedia Library).

Right-click on the saved file "Useful_tools_for_audio_craft", and choose "Send Mail." The "Send Mail" can also be chosen from a "File" menu.

Here, click the OK button as it is.
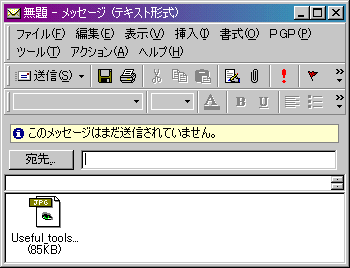
New message is created by the mail software (MS Outlook in this case), to which the image file you specified is attached.
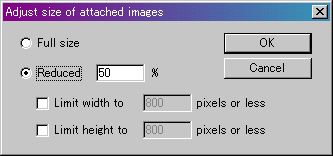
Now the size of the attached file "Useful_tools_for_audio_craft.jpg" is 85KB. It is possible to reduce this size if you think it too large. Return to the "Adjust size of attached images" dialog.
It may become trouble of your friend when a large data is attached to your mail. The procedure of reducing the size of a picture to 50% is explained.
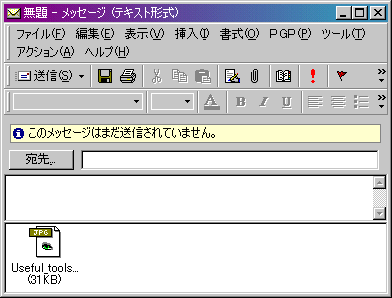
A file size became small (from 85KB to 31KB). Note that a file size does not always become 50% even if you made picture size 50%.
Now, let's send three pages of pictures collectively.
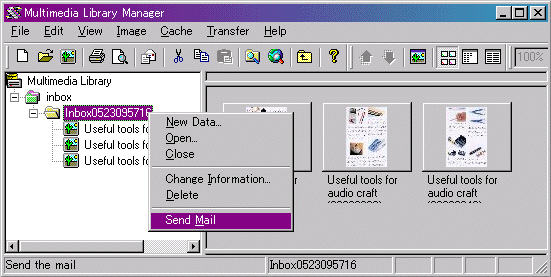
Right click on the folder "Inbox0523095716", and then choose "Send Mail."
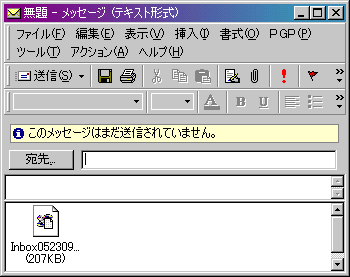
The attached file name is "Inbox0523095716.mml", and a file format differs from previously. It was ".JPG" previously, but it is ".mml" this time. This is the file type of "Multimedia Library". Using the software "Mmlib Viewer" (Mlibv), the person who received this file can open a file, and can see it or print the contents.
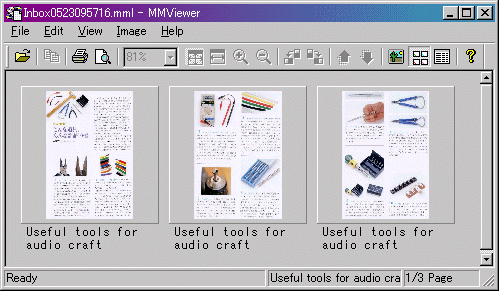
This is reduction display mode. Clicking the "Useful_tools_for_audio_craft.jpg" icon displays the whole picture as follow.
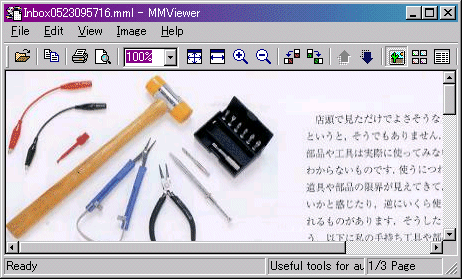
In "Multimedia Library", it is possible to summarize two or more pictures to one file, and to send them via Email. Of course, the size is also reducible by "Adjust size of attached images" dialog. Moreover, the received MML file can also be read into "Multimedia Library."
For that purpose, it is necessary to register a new "library." A library is the biggest unit that constitutes one database.
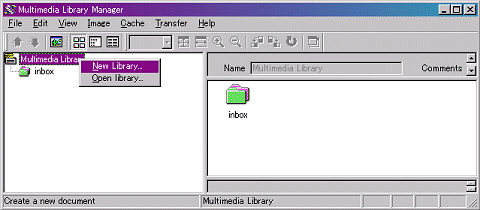
Right click of the "Multimedia library" icon and choose a "New library", or choose "New" from a "File" menu.
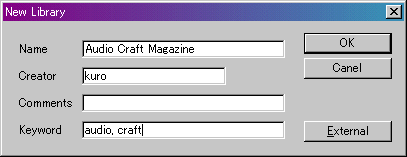
Fill in the "Name", "Comments", and "Keyword" column, and click the "OK" button. Then, new library is registered.
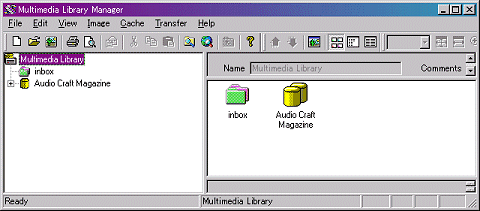
Move the folder saved at the "inbox" there.
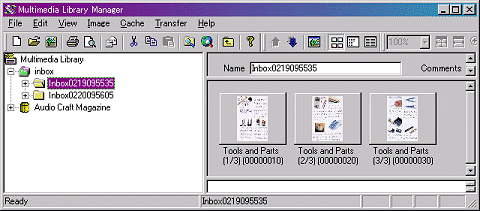
The folder moved under the library "Audio Craft Magazine".
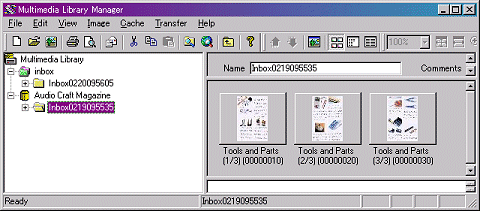
Now it is named Inbox0219095535. To change the folder name, right click the folder and choose "Change information".
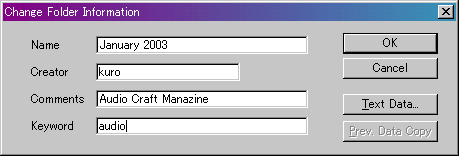
Change the name.
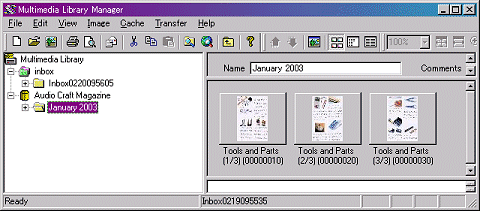
Now it was able to arrange intelligibly.
In multimedia library, you can move a folder to a library, or a file to a folder by drugging.
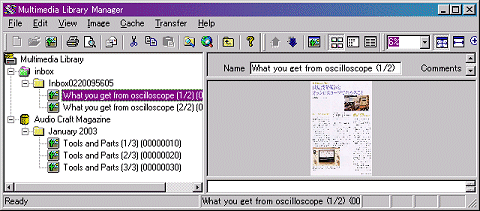
Move the contents in another Inbox to the folder created just before.
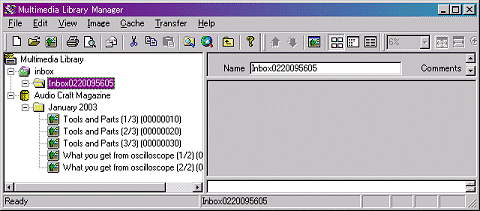
An unnecessary folder should be deleted. Right click the Inbox folder and choose Delete. The following dialog is displayed.
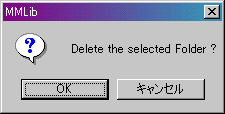
Click OK button. The folder is deleted. Note: When the folder is deleted, the files in that folder are also deleted.
Create a new library "sample".
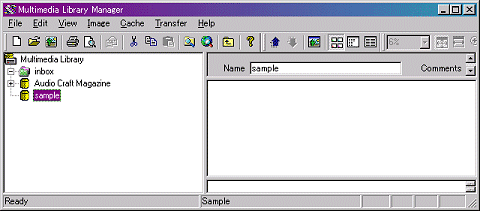
You need to create a new folder also, to store the picture file in the library.
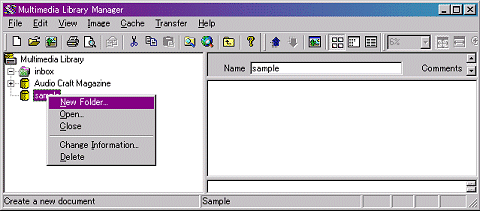
Right click the folder "sample" and choose "New folder". Here, the folder was named "TOKYO".
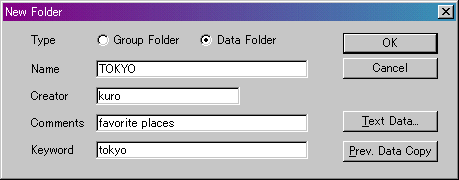
There are two kinds of folder. Group folder is a folder for folder, and Data folder is a folder for data. When you need a folder to arrange two or more folders, create a new Group folder.
Here, choose "Data folder" to store picture files in it.
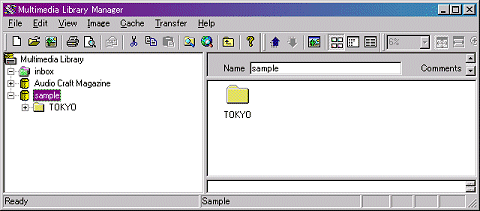
Store the picture files in the created folder. Copy the picture files to the "TOKYO" folder.
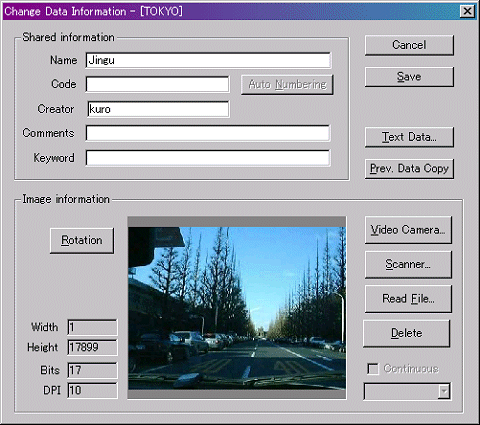
File name is filled in the Name column. Correct the name if needed, and fill in other columns. In the Keyword column, write the arbitrary keywords divided with "comma" or "space". Then click "Save" button. The pictures are registered. Click "Close" button to close the window.
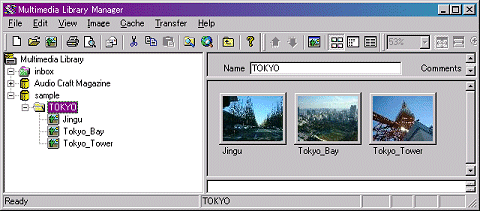
You can also register picture files by choosing "New" > "Read file" from toolbar.
1. Set password
Choose the library to set the password, choose "Set Password" from "File" menu.
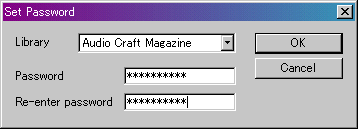
Input a password in this dialog. Whatever you input, * is displayed. Input the same password in "Re-enter password" to reconfirm it and click OK.
To cancel the password, choose "Set Password" again, delete the characters in password column, and click OK.
2. Access restrictions
Usually, it is in the state of "full access" in which all "display, add, update, and delete" are possible. For example, if you would not update a library, change the setting to "Display only". Then you can protect to update the library accidentally.
Choose the library to restrict the access, choose "Access Restrictions" from "File menu. The following dialog is displayed.
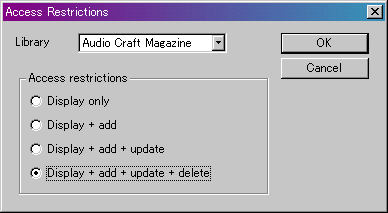
Choose the item and click OK. To cancel the restriction, choose "Display+ add+ update+ delete". When the access is restricted, the data in the library cannot be deleted.
3. Backup and Restore
Choose "Backup" from "File menu". The following window will open.
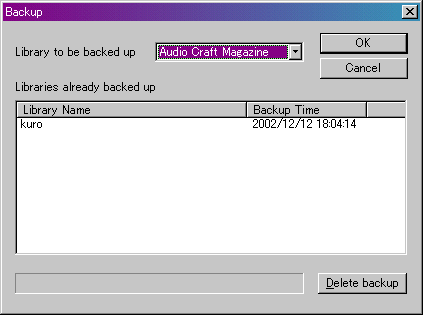
Choose the library to be backed up, click OK. In the area below, the backed-up libraries are listed. If there is unnecessary backed-up data, delete it.
To restore the backed-up data, choose "Restore" from "File" menu.
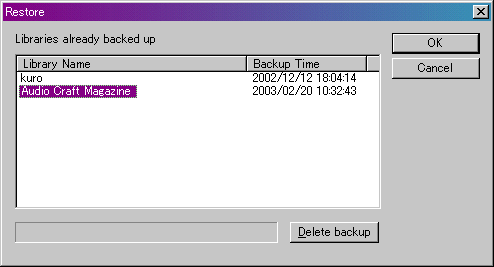
Choose the library to be restored, click OK. It does not overwrite, even if the library of the same name already exists.
The directory used for backup can be changed in the "Option" dialog of a "file" menu.

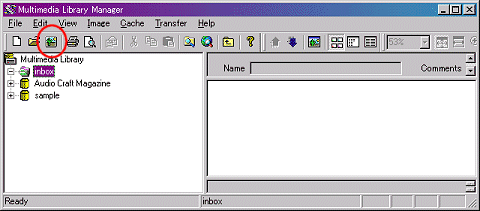
The following window opens to create a new data.
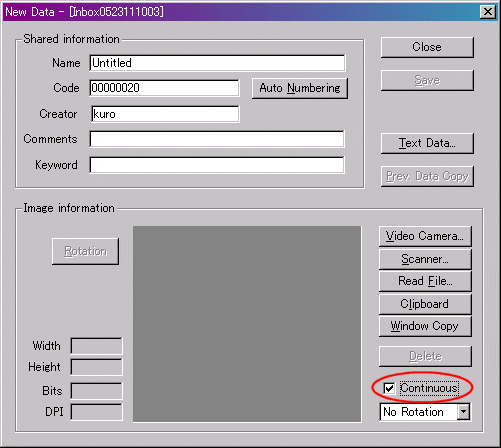
Check the "Continuous" like the figure above and click "Read File" button. Then the "Image file selection" dialog opens.
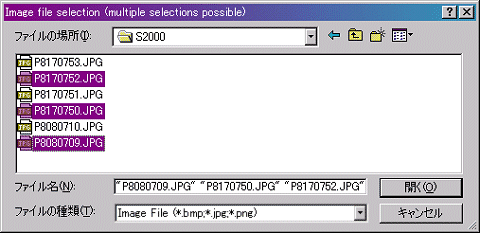
In the title bar of the dialog, it is displayed as (multiple selections possible). Here, you can select several files simultaneously. Click the file with CTRL key. You can select arbitrary files. If you click the files with SHIFT key, you can select files continuously. Finally, click the "Open" button. Then all the files are imported.
Also, several documents can be imported continuously by an image scanner with auto sheet feeder.
1. Search folder
Choose "Search Folder" from "Edit" menu. When a library is selected, the following window opens.
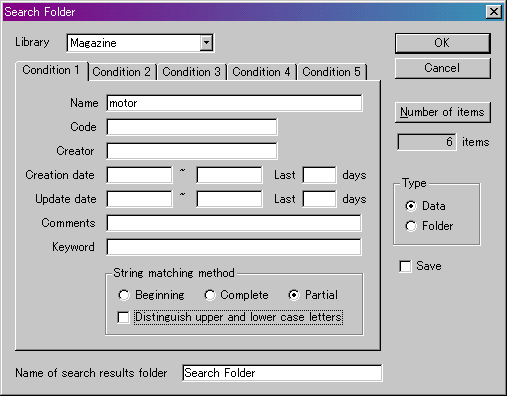
Here, the data that contains the "motor" in the "Name" is looked for. Click a "Number of items" button. It displays the found number of items as a result of search. When there are too many items, conditions should be narrowed down more. Finally click OK.
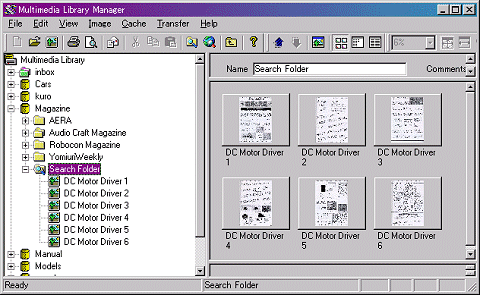
Search folder is created In the "Magazine" library in the main window. Found data is in that folder.
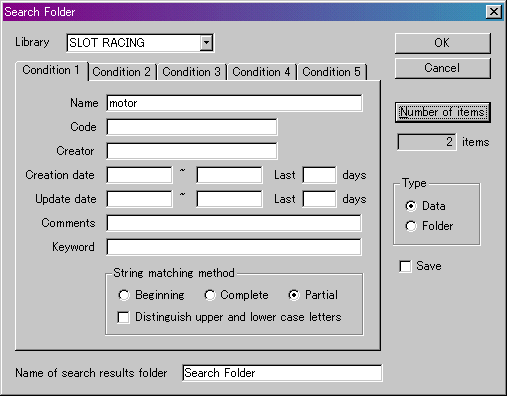
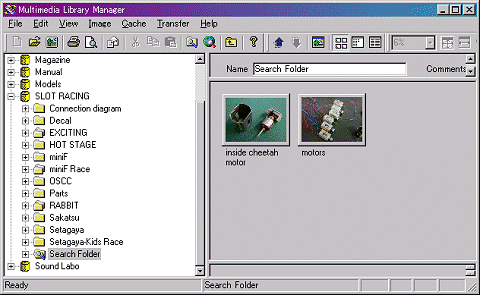
Thus, it is convenient to use a "Search folder" for searching within a library. On the other hand, what should it carry out to make all the libraries applicable to reference?
2. Keyword search
Choose "Keyword search" from "Edit" menu. From the menu of the displayed window, choose "Make Keyword Index". Then the following dialog is displayed.
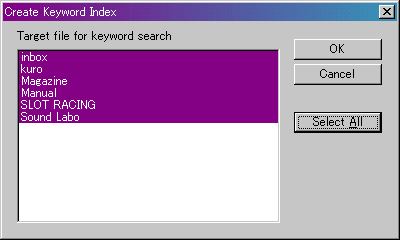
Here, click "Select All" button and click OK. If the indices were created, input as "motor" in the keyword column, and click "Search" button.
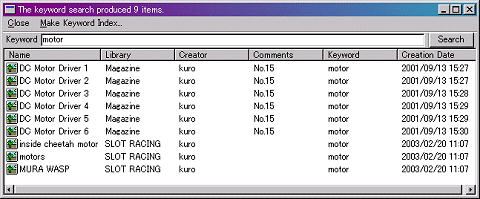
As in the figure, nine data was found. In the "Keyword search", the search result does not remain in the library as in the "Search folder". When you want to keyword search again after adding data or refresh the library, make the keyword index again. Unless, it searches based on the old index.
Search function will become an indispensable function after many data is accumulated. For that purpose, we recommend you to input the suitable words and phrases for the "keyword" column from the beginning.
| Y Store. |