
Y Store |
TOP
| STORE
|
DSSF3 |
Mmlib |
FAQ
|
Support
| Contact
Us
|
| Install guide, operation check, and data backup procedure |
![]() Install guide
Install guide ![]() Operation check
Operation check ![]() Data backup
Data backup
How to register (another page)
How to purchase the license (another page)
This is written for RAL, but the installation procedure is same for other products. At first, download the installer from the products page from the link at the top of this page.
1. Run the installer "PcAudioLTEME.exe". The "Install Shield Wizard" will start up; click on "Next".
Related Q&A
*I can't install the program. When I run the installer, I
get a message INST MSIA.EXE NOT FOUND. What should I do?
*How should I install the program when a PC to download
the program is different from a PC to install it?
*What is the hardware and software requirement?
2. The Product License Agreement will appear. Use the "scroll arrow" button to read through the text, and if you agree to its terms, click "I accept the terms in the license agreement"; this will activate the "Next" button and allow you to proceed. If you do not agree to the terms, please discontinue the installation.
3. Enter (or confirm) "User Name" and "Organization", and click on "Next".
4. The default installation folder is "C:/Program Files/RALE". (If you wish to install the program in a different folder, press the "Change" button on the right, and specify the folder for installation.) Click on "Next".
5. A screen will appear showing the settings for installation. Check that these settings are correct, and press the "Install" button. This will begin the installation.
6. When the message "InstallShield Wizard completed" appears, the installation is complete. Press the "Finish" button to close the dialog box.
Perform the online update when you start the program for the first time. The online update is in the Help menu.
Related Q&A
*What is the online update?
*I can't perform Online update. Error message "licence.dll
is not found" appears.
After the installation is completed, don't forget to check its operation. Simple check is to see if the program can generate and receive a sound by using the signal generator and the oscilloscope.
1. Start the Realtime Analyzer. Click the "Trial" button if you are not registered yet.
2. To input the signal to the oscilloscope, select WAVE/DirectSound as the input device. The name of the device depends on the hardware (e.g. Mixer, Stereo out). Sorry that the image below is Japanese.
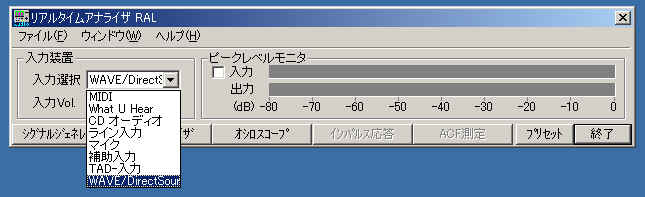
IMPORTANT
The input device selection in the Realtime Analyzer is interlocked with Windows recording volume control. In DSSF3, the sound device (soundcards or USB sound interface devices) can be specified in the Realtime Analyzer's main window. Different devices can be specified for input and output separately.
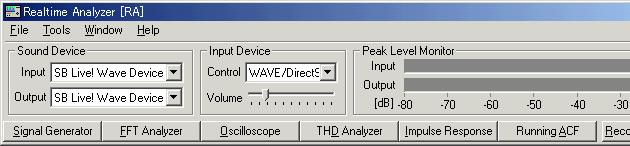
In RAL (and Realtime Analyzer of RAD and RAE too), the soundcard to be used in the measurement can be specified in the Windows control panel only. In the normal setting, the built-in soundcard on the computer is used as a default soundcard. In this case, you don't need to do the following setting. If you install other soundcard (e.g. USB or PCMCIA), you have to select that soundcard as follows.
For example, in Windows 2000, choose Start > Settings > Control Panel > Sound and Multimedia panel. Open the Audio tab and choose the appropriate item from the Preferred device list for Sound Playback and Sound Recording. Mark the "Use only preferred devices" checkbox. Now, the selected soundcard can be used in the Realtime Analyzer.

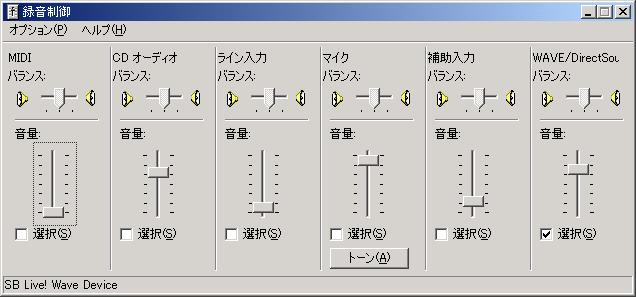
Below is the Windows volume control panel. Devices appear on this panel should appear on the input device selection list on the Realtime Analyzer too.
Related Q&A
*Input device does not appear in the selection list
3. Open the Windows volume control (Playback). Check the Mute except for WAVE.
4. Open the signal generator from the Realtime Analyzer. Set the frequency as 1000 Hz, check the "Lock" and the "Interlock" box and click the Start button. You should hear a sound from the PC's built-in loudspeaker.
5. Mark the Input check box of the Peak Level Monitor. Level of the incoming signal (in this case, output of the signal generator) is displayed.
Related Q&A
*Error message "Can't use mixer".
*The sound card does not appears in Realtime Analyzer's
input / output device selector. What should I do?
*Error message "The specified format is not supported or
cannot be translated. Use the capabilities function to determine the supported
formats."
6. Open the oscilloscope and click the start button. Sound waveform should be displayed on the window. If the top of the waveform is clipped, input volume must be too large. On the other hand, if the signal is noisy, input level is too small. Get back to the main window and adjust the input level.
The operation check ends. Program is working properly if the operation so far was confirmed.
In DSSF3 and RA series, on-line update never erase the data you have stored. However, when you "re-install" the program, all your data is erased, because the sample data (DATA folder) overwrites the existing data. To protect the existing data, reinstall the program in a different directory, or backup the existing data before reinstallation. Then restore it to the same location after reinstallation. This enables you to continue to use the existing data after reinstallation. If the program is installed by default, the DATA folder is located in the same folder as the .exe files of the program.
Related Q&A Backup of the measurement data
Setting Utility to specify the data folder (New function of DSSF3 version 5)
In the previous version of the DSSF3, measurement data was always saved in the "DATA" folder. To backup the data, this DATA folder had to be moved to the other location or renamed every time. But now, this problem has been solved. If you are using the DSSF3 version 5 or later, you can specify the data folder by using the setting utility (DSS.exe). Wherever the measurement data is saved (even in the other computer on the network), the DSSF3 can use this data. By this function, management of the measurement data becomes much easier.
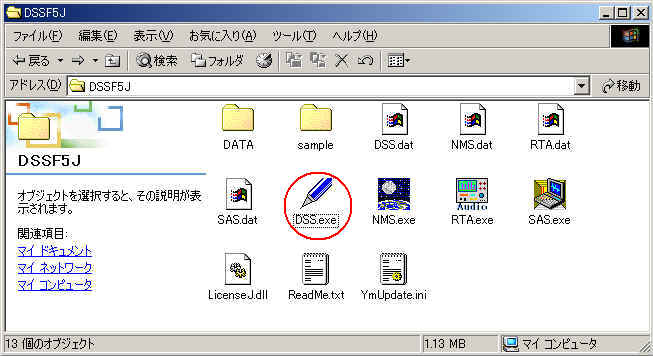
1. Run the DSS.exe and click the Reference button.
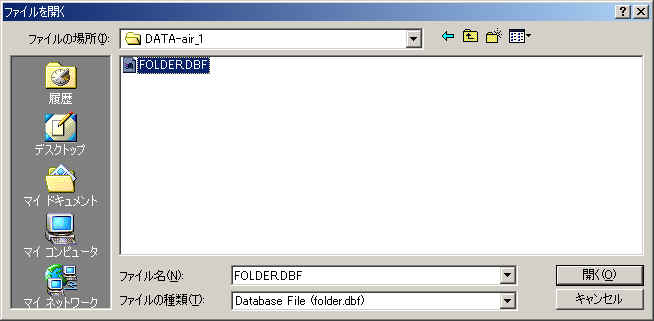
2. Specify the measurement data folder, then the file FOLDER.DBF is displayed. Select this file and click the Open button.
3. Click the OK button. Now the data in the specified folder is used by the DSSF3.
|
Copyright 息 1998-2010 Y Store (Since 1978) |