| TOP | STORE | DSSF3 | RAE | RAD | RAL | MMLIB | Support | Contact Us |
Last updated: 2005/03/08
As shown in the figure below, connect the microphones and the amplifier to the soundcard. To measure the spatial attributes by CCF, two microphones are needed. If you use only one microphone, connect it to the left channel. If you want to use a sound level meter (SLM) as input, connect the AC out of the SLM to the soundcard. See also RA manual, How to use a sound level meter.
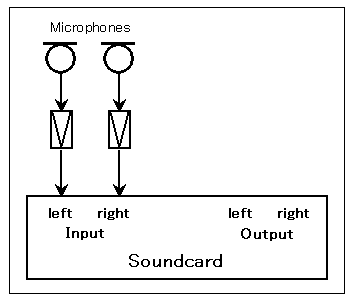
After connecting the device, open the "Input device"
dialog ![]() (or select the "Input device settings" from the
measurement menu). The configuration dialog appears as below. In this window,
selection of the input device, calibration of the input level and compensation of the microphone's
frequency response can be done. In particular, calibration of the input level is indispensable for measuring the sound pressure level (SPL).
(or select the "Input device settings" from the
measurement menu). The configuration dialog appears as below. In this window,
selection of the input device, calibration of the input level and compensation of the microphone's
frequency response can be done. In particular, calibration of the input level is indispensable for measuring the sound pressure level (SPL).
For how to save the calibration data, see the RA manual, Microphone setting. *EA and RA use the same data for microphone calibration. Once the microphone is calibrated, it can be used in both programs.
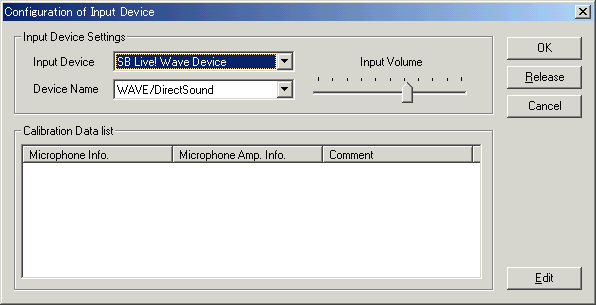
After adjusting the input level and saving the calibration data, select that
data and click OK. Now, the calibrated SPL can be measured by EA. To confirm
this, open the SPL display ![]() (or select "Sound Pressure Level" from the View menu) and start manual
measurement
(or select "Sound Pressure Level" from the View menu) and start manual
measurement ![]() (or select "Manual Measurement" from the Measurement menu). The SPL of the input signal is displayed in real time.
(or select "Manual Measurement" from the Measurement menu). The SPL of the input signal is displayed in real time.

3. Configuration of the measurement conditions
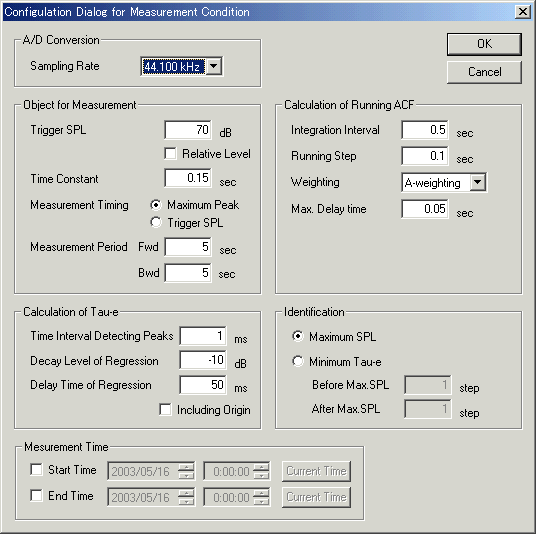
Next, open the "Measurement Conditions" dialog ![]() (or select the "Measurement conditions" from the
measurement menu). The configuration dialog appears as below. On this window,
measurement conditions can be set. It is important to set the conditions
correctly to perform the precise measurement.
(or select the "Measurement conditions" from the
measurement menu). The configuration dialog appears as below. On this window,
measurement conditions can be set. It is important to set the conditions
correctly to perform the precise measurement.
Below, the settings of "Object for Measurement" and "Calculation of Running ACF" are described.
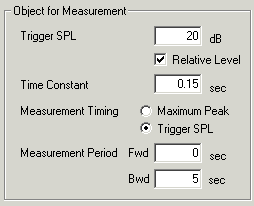
EA has a function that monitors SPL, and starts measurement automatically when the input level exceeds the specified trigger SPL. By specifying an appropriate trigger SPL, only the noise which has higher levels than the background noise level and appears irregularly can be measured very easily.
For example, set the items as follows.
In EA, all physical parameters including SPL are calculated by using the running ACF (autocorrelation function). For measuring the time history of noise levels, set the parameters as follows.
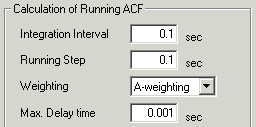
If you want to analyze noise in detail, it is necessary to measure the long range ACF with the high time resolution. In this case, set the "Integration interval" as 0.1 s, the "Running step" as 0.05 s, and the "Max. delay time" as 0.05 s. By these settings, the calculation load becomes large and it takes more time until the measurement finishes. But the more detailed analysis can be obtained.
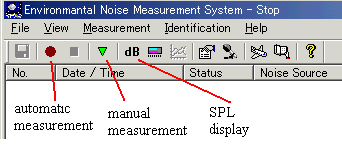
Automatic measurement
Select the "Automatic measurement" from the
Measurement menu, or click the ![]() button. During the measurement, sound is recorded only when its level exceeds
the "Trigger SPL", that is specified in the configuration
window.
button. During the measurement, sound is recorded only when its level exceeds
the "Trigger SPL", that is specified in the configuration
window.
Manual measurement
Select the "Manual measurement" from the Measurement
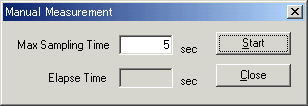
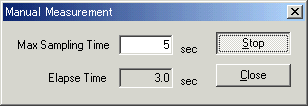
menu, or click the ![]() button. Then the Manual Measurement window appears as below. Enter the measuring
time and click the Start button. During the measurement, the elapsed time is
displayed. Even before reaching the Max Sampling Time, click the Stop button to
stop the measurement. Then the calculation is started immediately.
button. Then the Manual Measurement window appears as below. Enter the measuring
time and click the Start button. During the measurement, the elapsed time is
displayed. Even before reaching the Max Sampling Time, click the Stop button to
stop the measurement. Then the calculation is started immediately.
Display of the measured data
Measured data is displayed in the main window of EA as below. Max SPL during the measurement session and other acoustic parameters are displayed. If the noise source templates have been prepared beforehand, the identified noise source is also shown.

Automatic calculation option
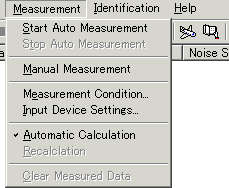
In DSSF3, noise recording can be performed alone without calculation. Release the check for the "Automatic calculation" in the Measurement menu. Recorded sound can be saved and then analyzed by SA if you want.
5. Display of ACF/IACF factors
After the calculation is finished, select the "ACF/IACF factor" from the View menu, or double click the measured data.The measurement parameters are displayed in a graph and a table form as below. Recorded sound can be listened to by clicking the "Playback" button.
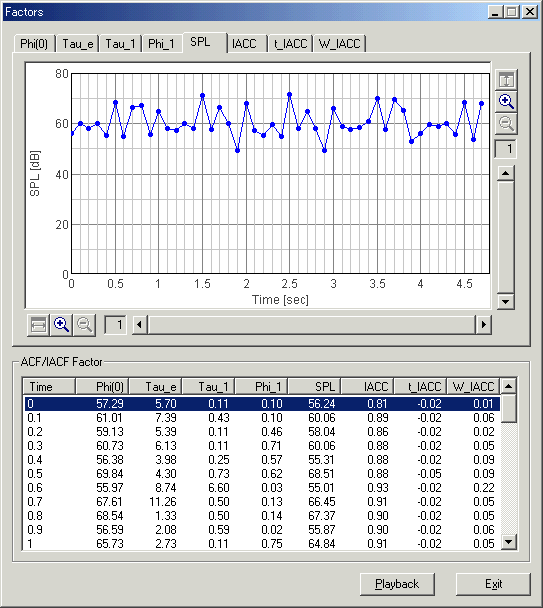
6. Loading of sound files (available in DSSF3 version 5)
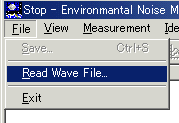
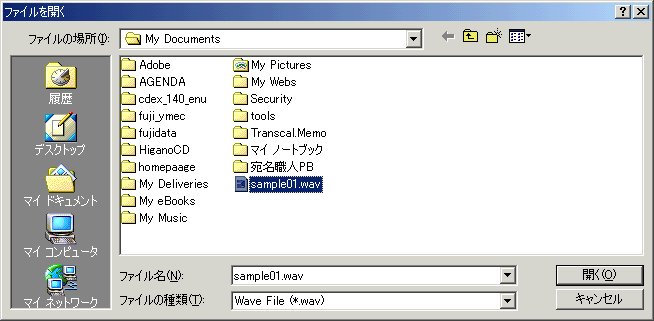
In the DSSF3 ver.5, sound files (.wav format) can be loaded and measured as same as the real time recording. Select the "Read WAVE file" from the File menu. The data open dialog appears as below.
Select the wav file and click the Open button. As the usual measurement, data is displayed on the main window and calculation is started automatically.
7. Saving the measurement data
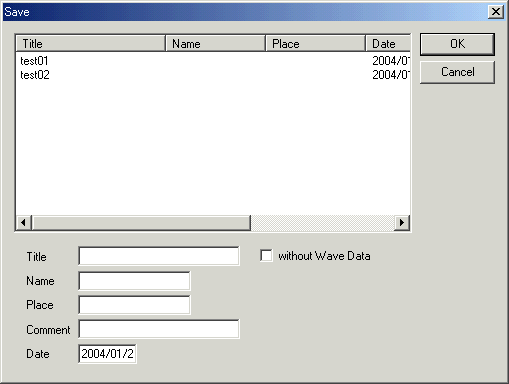
When the measurement is finished, select the "Save"
from the File menu, or click the ![]() button. The data save dialog appears as below. Enter the Title (Name, Place,
Comment is option) and click the OK button. Saved data can be analyzed by SA
(Sound Analyzer) later. If the "without Wave Data" box is checked,
sound data is not saved.
button. The data save dialog appears as below. Enter the Title (Name, Place,
Comment is option) and click the OK button. Saved data can be analyzed by SA
(Sound Analyzer) later. If the "without Wave Data" box is checked,
sound data is not saved.
| Yoshimasa Electronic Inc. |
| TOP | STORE | DSSF3 | RAE | RAD | RAL | MMLIB | Support | Contact Us |
If you have questions or comments about this
page,
feel free to contact us by email ymec@ymec.com
or by online
inquiry form.